Cammy and I had experimented with Fimo* (polymer clay) earlier this year when we made Mother’s Day gifts for her grandmothers. The clay was relatively easy to work with, and the necklaces turned out beautifully. Cammy has been asking to make more necklaces ever since.
An idea came to Cammy while we were reading my childhood copy of The Very Hungry Caterpillar to Baby Ike. While poking our fingers through the holes in the fruit, she commented that we could make fruit-shaped beads from the polymer clay.
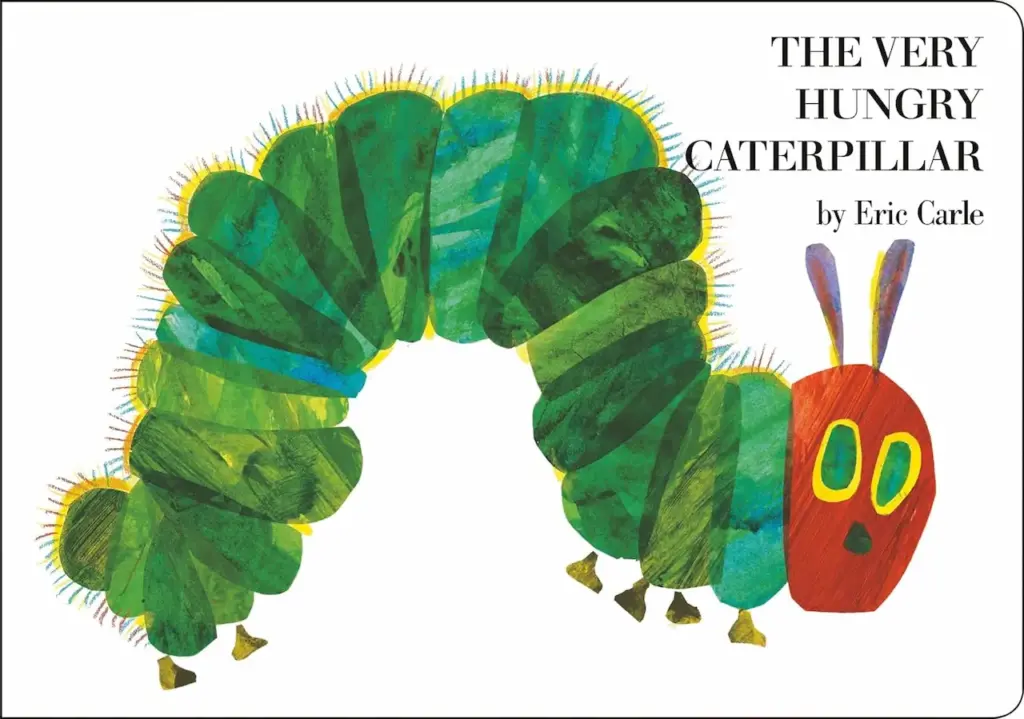
While Cam didn’t create these beads on her own, she needed very little help. We looked at the book for days in advance, as I allowed her the time to figure out how each piece of fruit could be recreated. I promise you that I am not at all crafty. I don’t even know how to sew a button, and this really is easy enough for kids to create- with the help of parents.
The process took about 1 hour (plus baking/hardening time), which explains why we have only created beads for half the story (We’ll make Saturday’s treats at a later date- they might just be a little too complicated for a 4-year-old to create). This is a craft project that can be played with for years to come. Not only is the final product something to be proud of, but the process was such a rewarding learning experience:
- Problem-solving while trying to work out how to re-create each piece of fruit
- Exercising fine motor skills while creating the beads
- Working as a team, and asking for help when a task felt too difficult
- Practising patience and perseverance
You will need:
- Coloured polymer clay (We used Fimo*) in red, green, orange, blue and brown.
- Baking paper or a placemat to use as a working surface (as the polymer clay can get sticky)
- A skewer, toothpick or straw for creating holes in the beads
- A knife (for cutting equal portions of polymer clay)
- Scissors
- A baking tray and foil
- A copy of The Very Hungry Caterpillar for reference.
- A child-friendly threading needle
- Ribbon*Please read the instructions on the polymer clay packaging. It should be used under strict parental supervision and is not actually recommended for children under 8.
Instructions:
1) We used 1/12 of a polymer clay block for each piece of fruit
2) Create the caterpillar and each piece of fruit- Keep scrolling to find the individual instructions for shaping each piece of fruit
3) Once you have shaped each piece of fruit, pierce it with a skewer to create a hole. This step requires teamwork
4) Push a straw through the hole to enlarge it. This will make it easier for your child to thread the beads when playing with the activity set. (At this point check that the needle you have will fit through the holes in each piece of fruit)
5) Place the finished pieces of fruit onto a foil-lined baking tray
6) Place the tray in the oven, at 110°C/230°F, for 30 minutes
7) After 30 minutes, remove from the oven and allow to cool
8) Once cooled, the beads will be ready for play
9) Tie the end of the ribbon to the threading needle
10) Thread the ribbon through the caterpillar and each piece of fruit
11) When all the beads have been added to the ribbon, tie the ribbon around your child’s neck to create a necklace
How to shape the apples (x1), plums (x3) and oranges (x5)
These three particular fruits were easy enough for Cammy (age 4) to create on her own without my assistance.
Roll small pieces of polymer clay into balls. We used 1/12 of a block for each piece of fruit.
- The apples and plums can be squeezed a little between the finger and the thumb to create more of an oval-shaped piece of fruit
- Use the brown polymer clay to create a stalk for the fruit. You only need a small piece to roll a very thin stalk.
Create a small hole for the stalk at the top of the fruits. You can do this by poking the top of the fruit with a toothpick or skewer. Insert the stalk into the small hole you have created. Add a little pressure so that the two pieces of clay adhere to one another
Pear x2
- Start by rolling two pieces of polymer clay into round balls
- Squeeze and pull the top of the ball to elongate the shape a little. Use your finger and thumb to shape the top of the pear
- Use the brown polymer clay to create a stalk for the fruit. You only need a small piece to roll a very thin stalk.
- Create a small hole for the stalk at the top of the pears. You can do this by poking the top of the fruit with a toothpick or skewer. Insert the stalk into the small hole you have created. Add a little pressure so that the two pieces of clay adhere to one another.
Strawberries x4
- Again, start by rolling four pieces of polymer clay into balls.
- Take each ball and sit it on the working surface
- Gently push down on the ball to create a flat surface for the top of the strawberry
- Keeping the polymer clay on the working surface, take the clay in between your forefinger and thumb and squeeze gently together. Turn your fingers 90 degrees, and squeeze again. Repeat this process, back and forth, until you create a gentle pyramid-type shape
- Roll a small piece of green polymer clay on the working surface.
- Push it down to create a flat pancake.
- Use scissors to cut a star shape from the pancake
- Place the green star over the flat part of the strawberry. Add pressure so that the two pieces of clay adhere to one another.
- Use the green polymer clay to create a stalk for the fruit. You only need a small piece to roll a very thin stalk.
- Create a small hole for the stalk at the top of the strawberry. You can do this by poking the top of the fruit with a toothpick or skewer. Insert the stalk into the small hole you have created. Add a little pressure so that the two pieces of clay adhere to one another.
The Very Hungry Caterpillar
This was the hardest piece to create, mainly due to its small size. Children can easily create the caterpillar log, but parental assistance is needed to mold the shape and create a hole.
- Roll a piece of green polymer clay into a short log
- Push the two ends of the log together to create a wave/peak in the centre. It will be easier to pierce a hole through the caterpillar if the two ends of the clay are pressed together (i.e. no gap).
- Create a head by rolling a small ball with red polymer clay. Attach it to the green caterpillar and press firmly
- Roll two antennae with the green polymer clay and attach them to the red head
- Roll two tiny eyes with the brown polymer clay and attach them to the red head


