Many readers were appalled at the idea of cutting the pages of their beloved Golden Books. Surprisingly, that didn’t seem to bother me so much. I suppose because I dog-ear and write in many of my books. What I did grapple with was losing the story element from the books by cutting the pages. I was hoping that whatever I decided to do with my damaged Golden Books, I would still be able to continue sharing the Golden Book stories with my daughter.
While I was brainstorming ideas, something else was happening in my home: My daughter was (and still is) asking for me to tell her stories. ALL THE TIME: at breakfast, in the car, and at nap times, and I am rapidly running out of ideas. I needed new ideas, and I needed them FAST!
We had collected stones for another project and then I was recently reminded of the story stones when I read a post on Red Ted Art about painting stones. I’ve also seen story-stones created for children at Red BirdCraft and Childhood 101. But, instead of creating fabric images or drawing on the stones, I decided to use the images that I cut from the Golden Books as the motifs for the stones.
Story Stones:
Stones have been painted and used in storytelling for centuries by indigenous cultures.
Story Stones are great for story-telling but they are also:
- Durable
- Tactile and transferrable
- Waterproof and can be used anywhere indoors or out in the car, at a café, in the garden, in the classroom, etc.
How to use the Golden Book Story Stones for storytelling:
- Don’t do anything with them in particular. Give them to your child and see where their imagination takes them.
- Use the stones as a stimulus for story-telling:
-You can select a particular number of stones (e.g. three) from the set. Lay them out and use them to plan and create a story.
-Re-arrange the order of the stones and see how that changes the story.
-Randomly select one stone at a time, spontaneously incorporating each object into the story as you go.
- Create a scene (a 2D backdrop or 3D diorama) for the story to take place. The stones become moveable props in the story.
- Select a stone from the set and talk about the stories you know that include that object (e.g. if you select a ‘rabbit stone’ you might talk about Peter Rabbit, The Knuffle Bunny, The Velveteen Rabbit, and Miffy)
- Select a stone from the set and use that as inspiration for a family activity (e.g. if you pick out a ‘flower stone’ you might decide to spend some time playing in the garden)
- Spend some time talking about the rocks: Describe them, name them, and give them a back story.
- Hide the rocks and give your child clues to find them. Your child might also like to hide the rocks from you and help you to find them.
- Care for the rocks as if they are pets.
- Sort the stones into groups. See how many different groups you can make.
- Use the rocks to help you discuss PARTS OF SPEECH. E.g. Choose a rock and identify whether it is a noun, verb, adjective, etc. Brainstorm synonyms for the word or adjectives to describe nouns etc.
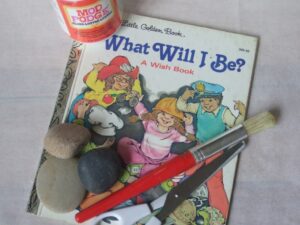
To make Golden Book Story Stones, you will need:
- Damaged Golden Books
- Scissors
- Collected stones (in a range of sizes)
- Decoupage Glue (We used Modge Podge)
- Glue Brush
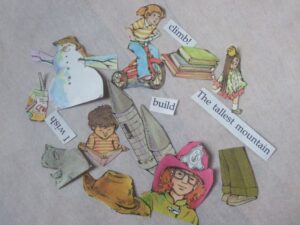
- From the books, cut the images and words that you’d like to use on your stones
- Use the decoupage glue to fix the images to the stones
- Allow 20 minutes for the images to dry
- Apply extra layers of the decoupage glue to seal the images. The kids will love helping with this part of the project as the glue dries clear. Allow 20 minutes between applications. We applied three layers of glue.
- Waiting for the glue to dry (My two-year-old loved applying more and more and more- so we needed to wait a little longer than 20 minutes)
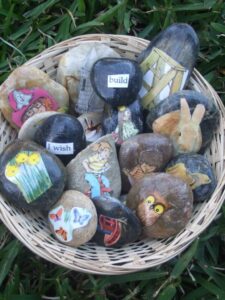
- Some of our stones display images
- Some of them display words


